You can add and edit existing statuses to reflect the true flow of work throughout your organization. Utilizing your own unique statuses can provide quick and easy insight into the progress of campaign and project work and help keep your teams in sync. These custom statuses will appear within the details and list views for both campaigns and projects.
Custom Statuses are only available for Business and Enterprise customers.
Adding a new custom status
Access to Account Settings is managed by the permission Manage Account Settings.
- To create a new status for your account, navigate to Account Settings by selecting your avatar in the bottom of the global navigation bar.
- From the Settings sub-navigation menu, select Custom Statuses.
- Click Add Status in the top right-hand corner of the page.
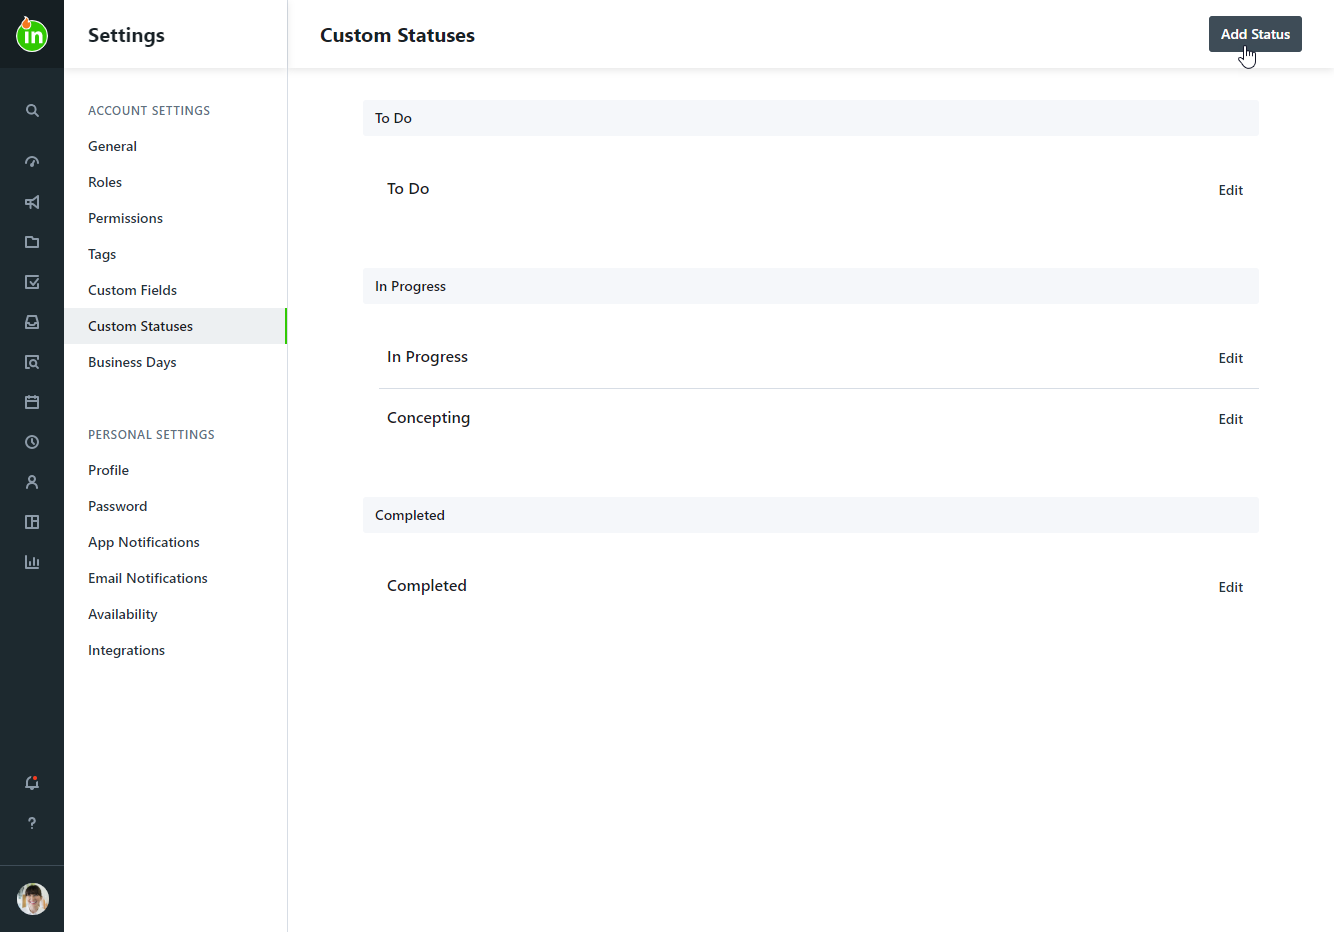
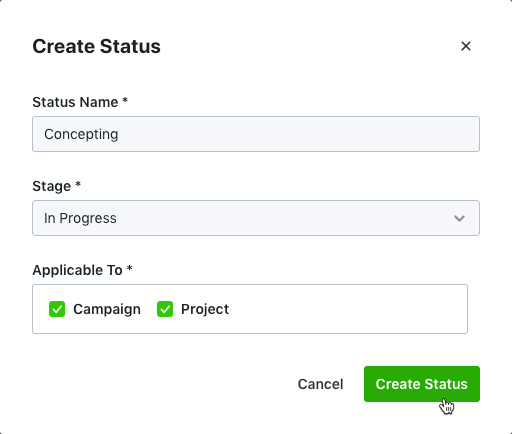
- Enter the status name you'd like to use and choose the stage that it belongs to. The stages are generally defined as follows:
- To Do - Work is not yet started.
- In Progress - Work is active and underway.
- Completed - Work was finished. Any status belonging to the completed stage will function the same in terms of filtering and request management.
 If your team has either the "Require the Completion of Projects in Campaigns" or "Require the Completion of Work in Projects" restriction enabled under General Account Settings, your custom statuses must be assigned to the Completed stage in order to be used when closing out work.
- Choose whether it's applicable to campaigns, projects, or both.
- Click Create Status.


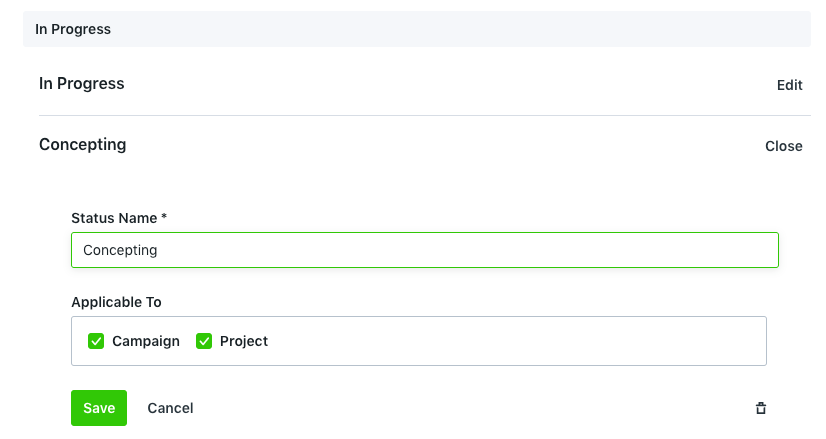
Editing an existing custom status
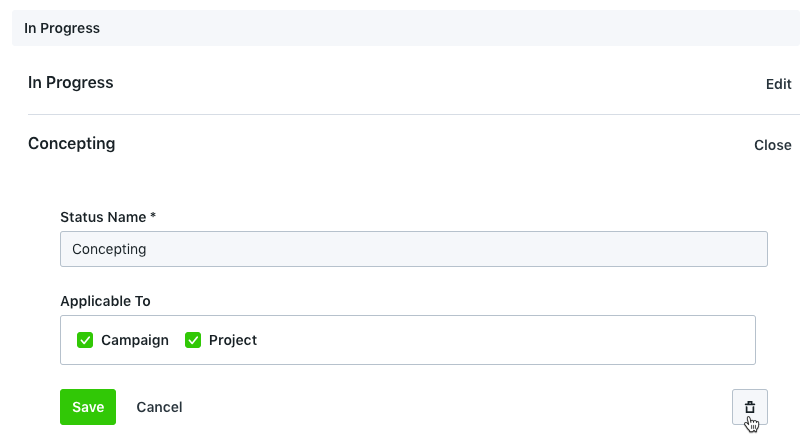
- Navigate to Account Settings > Custom Statuses and select the status you would like to edit.
- Update the status name and whether it's applicable to campaigns, projects, or both, and click Save.

You can drag and drop to change the order of custom statuses within each stage. The new order will reflect in the status selection menu of existing and new projects and/or campaigns.
Deleting a custom status
Each stage must have at least one status. Once a stage has more than one status, you can remove a custom status as necessary. The system will not allow you to delete any status that is currently applied to an existing project or project template.
- Navigate to Account Settings > Custom Statuses and select the status you would like to remove.
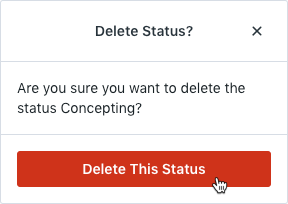
- Click the Delete icon to the right of the Status Name.
- Confirm your selection by clicking Delete This Status.


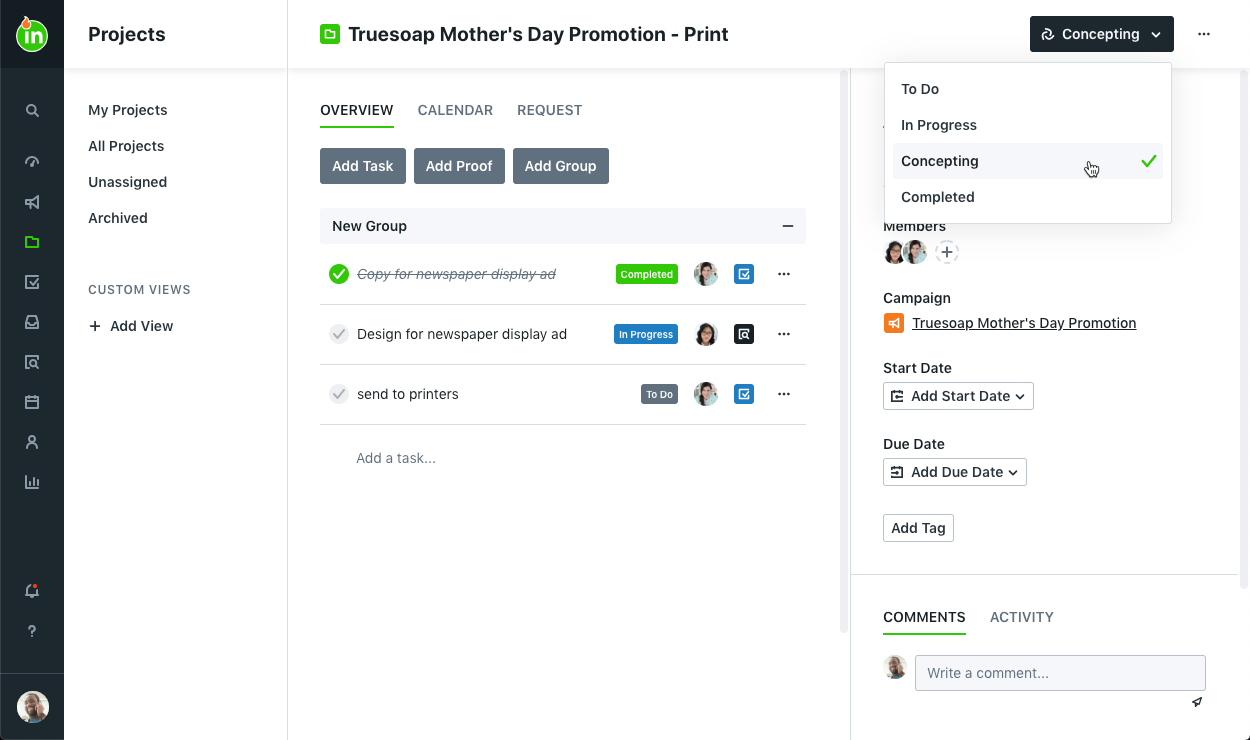
Applying a custom status
By default, any new campaign or project will be given the first status listed in the 'To Do' stage. To make changes to the Custom Status, click on the status link in the top right corner and select the updated status. This link will always reflect the current status of the campaign or project.