
Adding New Users
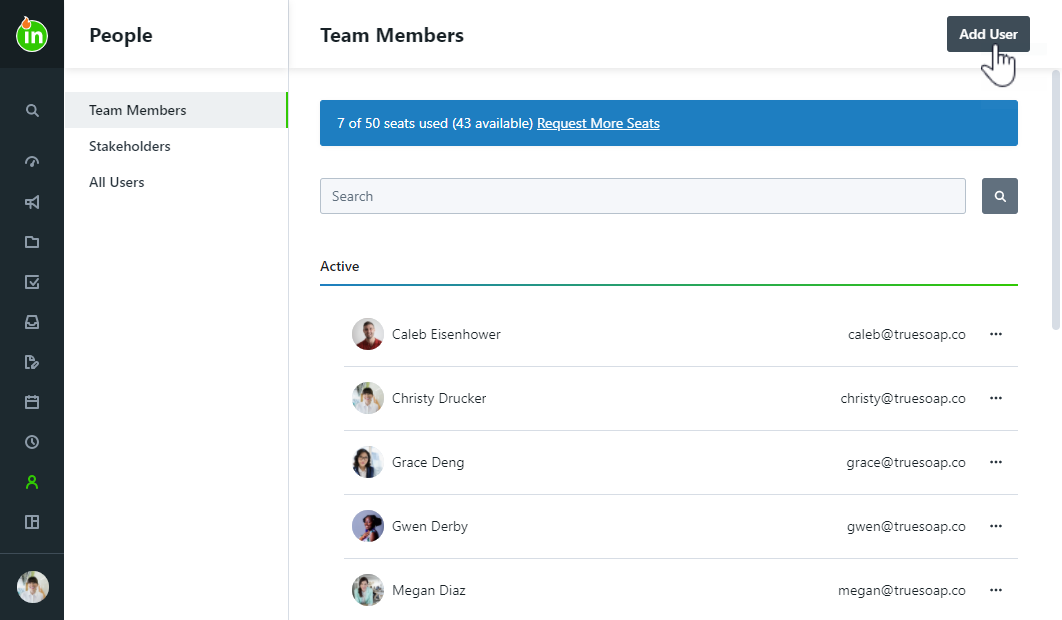
When adding paid seat users, select the Team Members sub-navigation to see how many seats are used and available.
To add a new user, select the People icon from the main navigation menu. Click Add User in the top right of the page.
To invite a single team member, the INVITE tab will appear by default in the Create User modal, allowing you to enter the user information.

Select a Role Type and Role from the drop-down menu to apply the appropriate level of user permissions. If you have Specialties set up in your account, select the appropriate specialties for the user. If you prefer to manually invite this user, uncheck the Send welcome email to new user option to determine the appropriate invite timing.
To add multiple users, click on the IMPORT tab in the Create User modal, allowing you to bulk import up to 500 users at once.
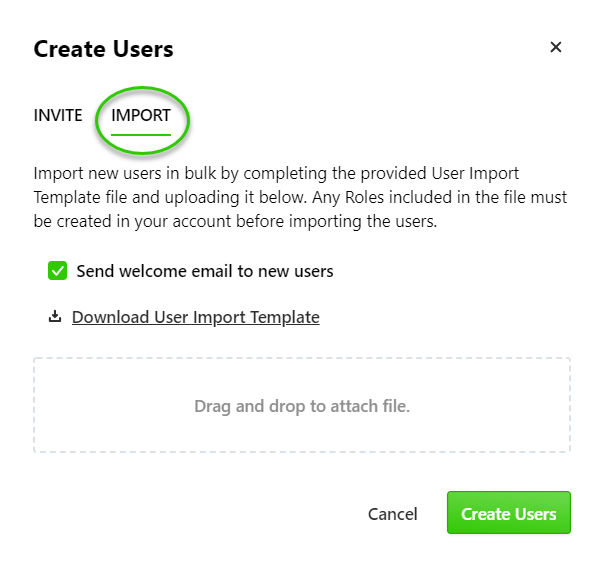
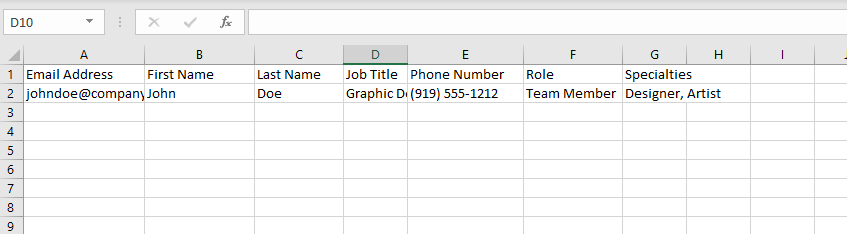
Click Download User Import Template to open a CSV template to add users. The template provides an example of how to input the relevant data for each user.
Once all user information is added, drag and drop the updated CSV file into the Create User modal to begin the import. If you would like to manually invite these users, uncheck the Send welcome email to new users option. Click Create Users to complete the import.
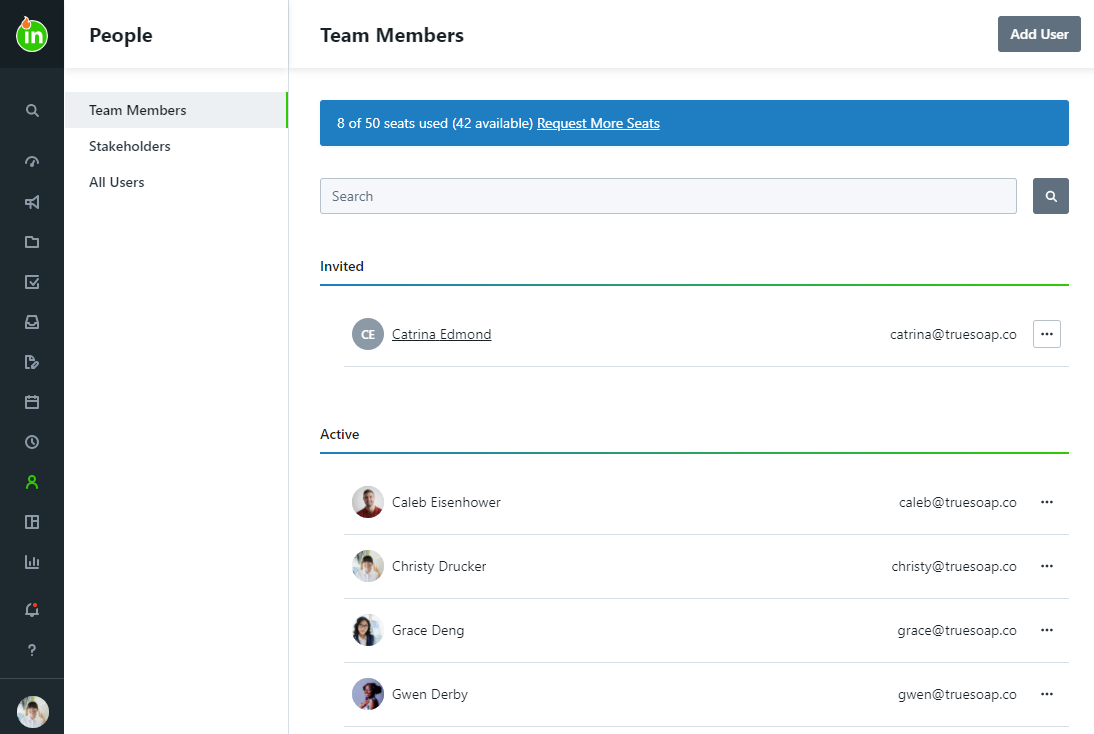
Once the user(s) have been created, they will receive an email inviting them to set up their account with inMotion ignite. From the People management screen, new users will show in the Invited section until they set up their account. Once they have logged in to the account, their user card will move to the Active section.
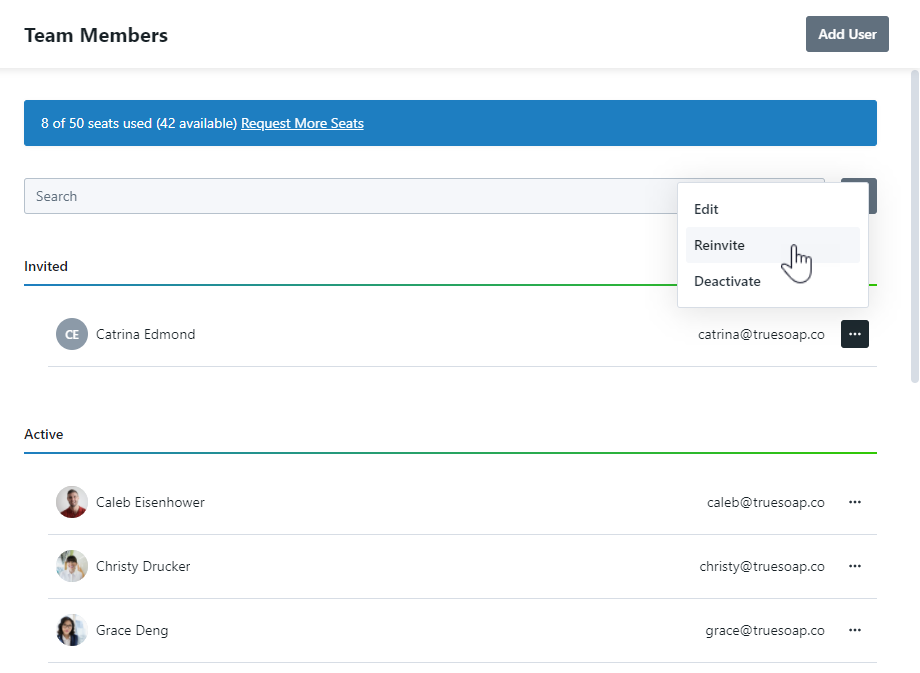
Reinviting Users
If a user fails to set up their account within seven days of user creation, the link in their email invitation will expire. You can reinvite users at any point in time from the People management screen. Select the action menu on the right of their user card and then select Reinvite. This will resend the email invitation prompting the user to set up their account.
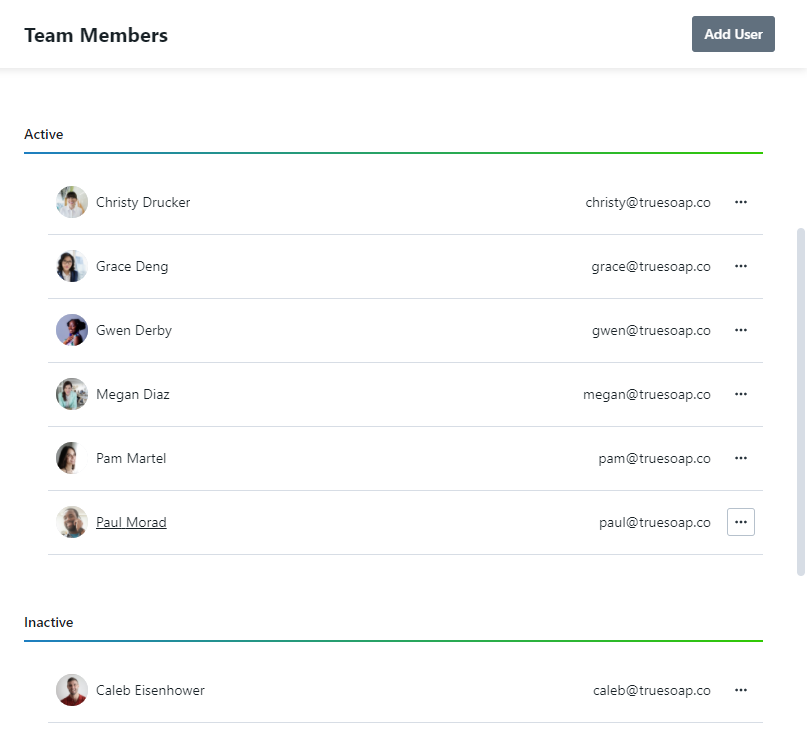
Deactivating Users
If a user leaves your organization or you need to disable their account for any reason, you can deactivate a user account from the People management screen.
Select the options menu found to the right side of the relevant user card and choose Deactivate.

The user will then move to the Inactive section.
Deactivating a user will maintain all historical data related to their past activity in the account, however they will no longer be available for assignment to work. The deactivated user will no longer be able to login or receive email notifications. If the deactivated user was a paid user seat, this will become an available seat for a new user.
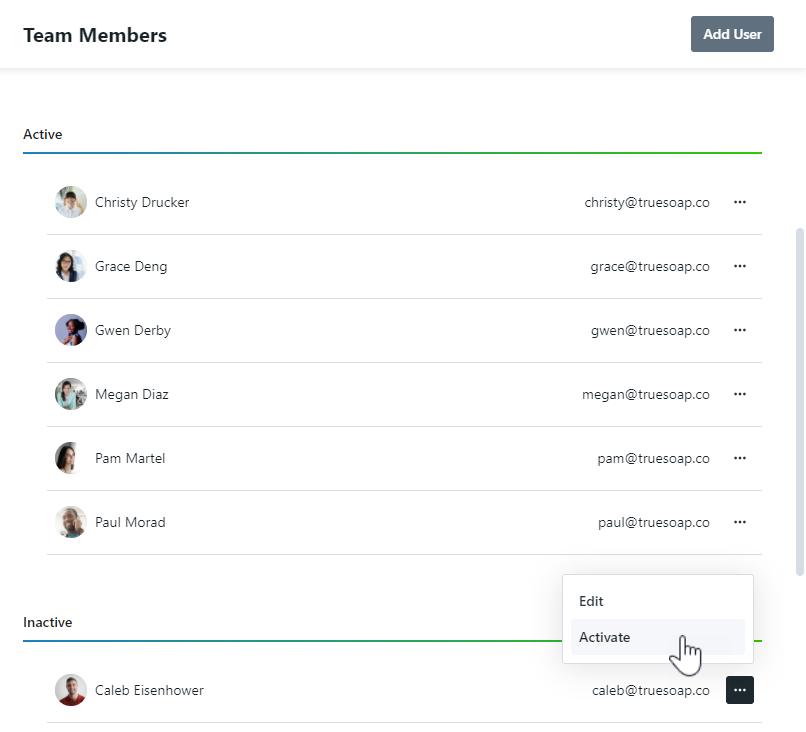
Activating Users
If for any reason you need to activate a previously deactivated user, you can click on the action menu found on the inactive user card and select Activate. This will move the user back to the Active section.
Editing User Emails
Admins can update any user's email address. To do so, find the user you'd like to edit. Open the action menu to the right of their name, then Edit, make your changes, and click Save.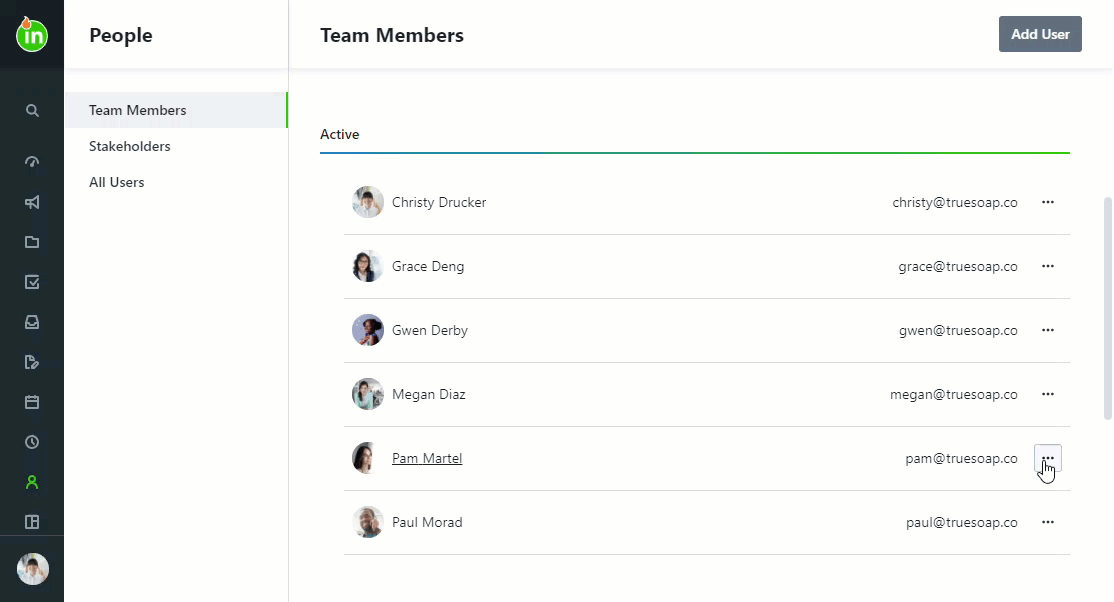
Resetting User Passwords
Admins can also trigger a password reset email for all active users. To do so, find the user who needs their password reset. Open the action menu to the right of their name, then Edit, then Reset Password. They will receive an email with instructions to reset their password.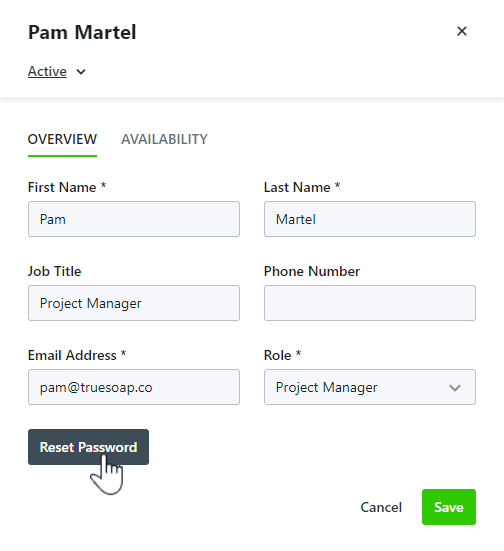 This will also unlock a user account that has been locked due to multiple failed login attempts.
Managing User Availability
Manage availability and time off for your users from the people page or a users report. Select a Team Member and click the AVAILABILITY tab to make updates. 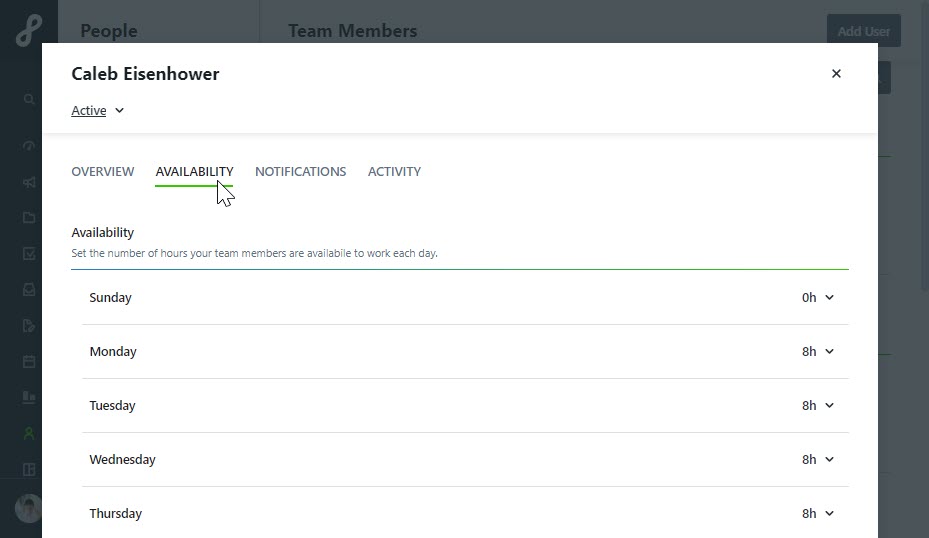
Managing User Notifications
Manage the notification settings of your users directly from the people page or a user report. Select a user and click the NOTIFICATIONS tab to make updates. Users will still have the ability to make changes to their notification settings.

User Activity Log
View a log of actions taken against a user from the people page by selecting a user and clicking the ACTIVITY tab.

The following activities are captured:
- User created
- Invitation resent
- Request password reset
- Password reset by email
- Role updated
- Notification preference updates
- Email changed
- User requested more seats
- User disabled