
This guide will walk you through setting up inMotion ignite single sign-on using Okta. In addition to your setup in Okta, there are two action items you will need to send to inMotion Support so we can finalize the integration on our end.
This guide uses Okta's Classic UI. If you're using the Okta Developer Console, you can switch to the Classic UI using the dropdown in the upper left corner.
Creating the inMotion Integration in Okta
On the Okta Applications page, click Create New App.
On the Create a New Application Integration modal, assign your Platform as "Web" and your Sign on method as "SAML 2.0." Click Create.
Name the app, set up your App visibility, then click Next.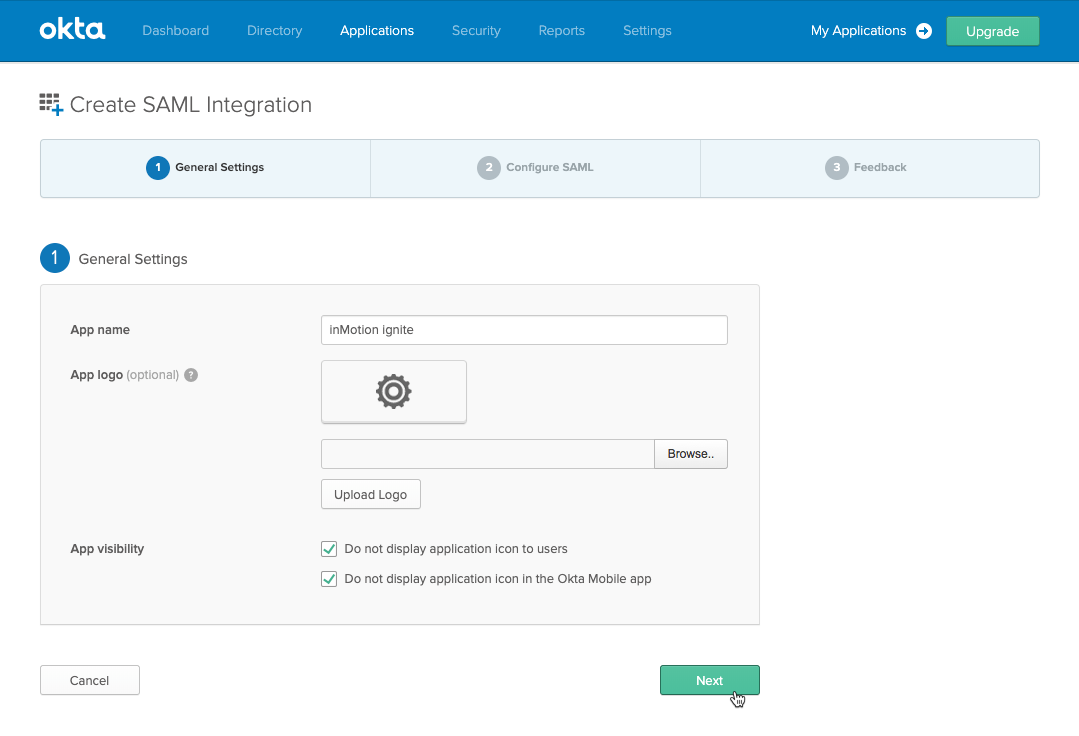 Since IdP Initiated Sign On is not a supported login flow, we recommend checking both "Do not display application icon to users" and "Do not display application icon in the Oka Mobile app" under App visibility.
SAML Settings
After you've named your app integration, you'll configure your SAML Settings. Use this numbered guide to determine what to enter into each settings field.
- Single sign on URL: https://inmotion.auth.us-east-1.amazoncognito.com/saml2/idpresponse
- Only check "Use this for Recipient URL and Destination URL"
- Audience URI (SP Entity ID): urn:amazon:cognito:sp:us-east-1_SvA0fLf8R
- Default RelayState: Leave this field blank
- Name ID format: Select "Persistent"
- Application username: Select "Email"
Under Attribute Statements, use "Basic" as the Name format, then assign these Names and corresponding Values: - Email >> user.email
- LastName >> user.lastName
- FirstName >> user.firstName
We recommend the above Names for steps 6-8, but you can choose whatever Names you'd like. Regardless of whether you use the above or something different, make a note of the exact Names you enter, because you'll need to send them to inMotion Support. Names are case-sensitive.
Completing the Integration
After you've entered the SAML settings, Okta will ask for your feedback. Complete this section by selecting "I'm an Okta customer adding an internal app" and "This is an internal app we have created." Click Finish to complete setup.

On the confirmation page for your new inMotion application, click "Identity Provider metadata" to get a URL of your metadata; make a note of the URL, as you'll need to send it to inMotion Support.
Assigning Users
To give users access to your new integration, click the Assignments tab, then Assign on the inMotion application page.
 You can choose Assign to People if you'd like to assign individual users to inMotion, or Assign to Groups if you'd like to assign entire user groups.
Final Action Items - What we need from you
In order for the inMotion integration in Okta to be completed, you will need to send your Attribute Statements Names (steps 6-8 under "SAML Settings") and your "Identity Provider metadata" (the final step of "Completing the Integration") to inMotion Support. Email that information to us at support-ignite@inmotionnow.com along with your inMotion account subdomain, and we'll help complete your setup!
If your team's inMotion ignite account URL is xyzcompany.ignite.inmotionnow.com, xyzcompany is your subdomain.